add-circle-bold add-circle add-square add alarm-bell-1 alert-diamond analytics-pie-2 archive archive arrow-down-1 arrow-down-2 arrow-left-1 arrow-right-1 arrow-up-1 attachment-1 bin-paper-1 book-star button-record check-1 check-circle-1 close close-quote close cog-1 cog common-file-stack copy-paste credit-card-1 diagram-fall-down disable time-clock-midnight download-thick-bottom drawer-send envelope-letter envelope-letter expand-6 expand-6 file-code filter-1 floppy-disk flying-insect-honey folder-file-1 headphones-customer-support hierarchy-9 hyperlink-2 information-circle keyboard-arrow-down keyboard-arrow-up layout-module-1 list-bullets lock-2 lock-unlock-1 love-it messages-bubble-square move-to-top multiple-circle multiple-neutral-1 multiple-users-1 navigation-menu-horizontal navigation-menu network-browser open-quote pencil-1 pencil-write pencil-1 print-text rating-star rating-star remove-circle remove-square-1 search send-email-1 shield-warning single-neutral-actions single-neutral smiley-sad-1 smiley-unhappy smiley-indifferent smiley-smile-1_1 smiley-happy smiley-sad-1 smiley-unhappy smiley-indifferent smiley-happy smiley-thrilled social-media-twitter synchronize-arrows-1 tags-double ticket-1 ticket-1 time-clock-circle undo view-1 view-off view wench

How to Use the Event Registration Functionality

There are several benefits to using the event registration functionality on the THI website. These benefits include: 

1.    Your participant’s email address and first/last name will automatically be added to the THI database.
2.    After submitting their email address via the registration, they will automatically receive an email from THI encouraging them to set up their own THI account.
3.    The participant’s name will auto-populate in post-event reports.

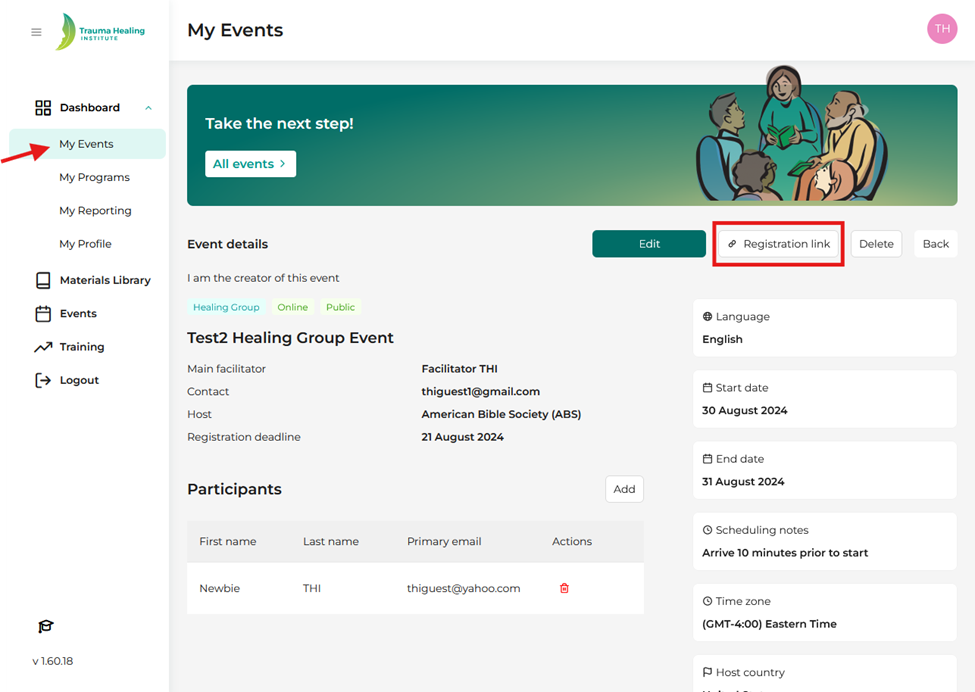
Step 1: To have someone register for your event, you can copy the registration link from the “Event details” page. This link will send them directly to your event listing.

Step 2: Send your interested attendees an email or message with the registration link. 

Step 3: To see those who have registered for your event, go to “My Events”.

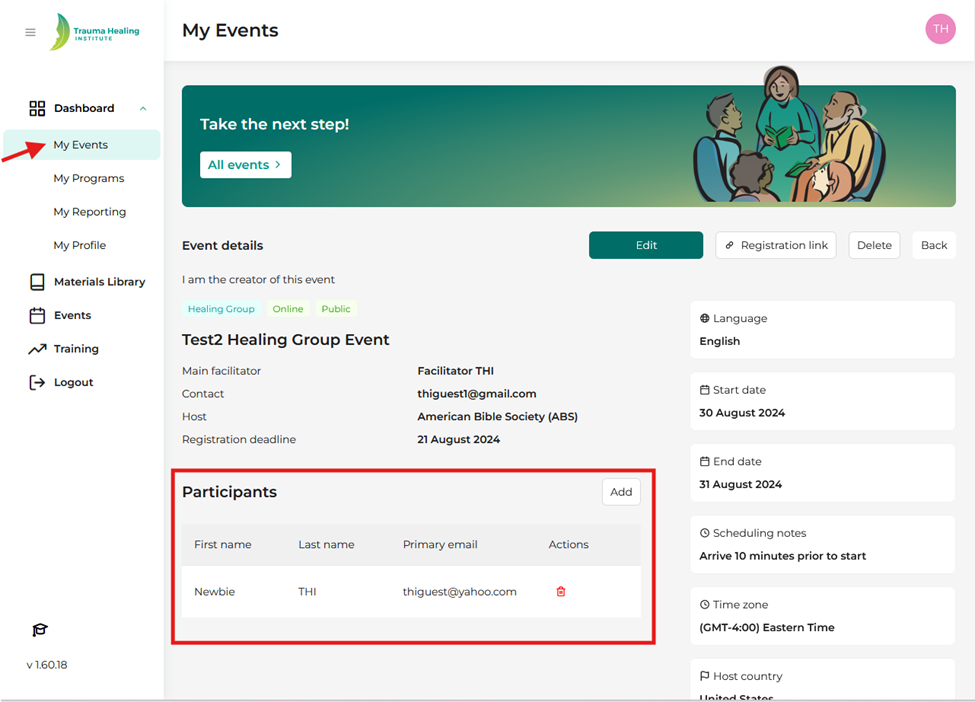
Step 4: Click on the event and look at the “participants” section. Please note: You can click the red trashcan icon to remove a participant if someone wants to cancel their registration.