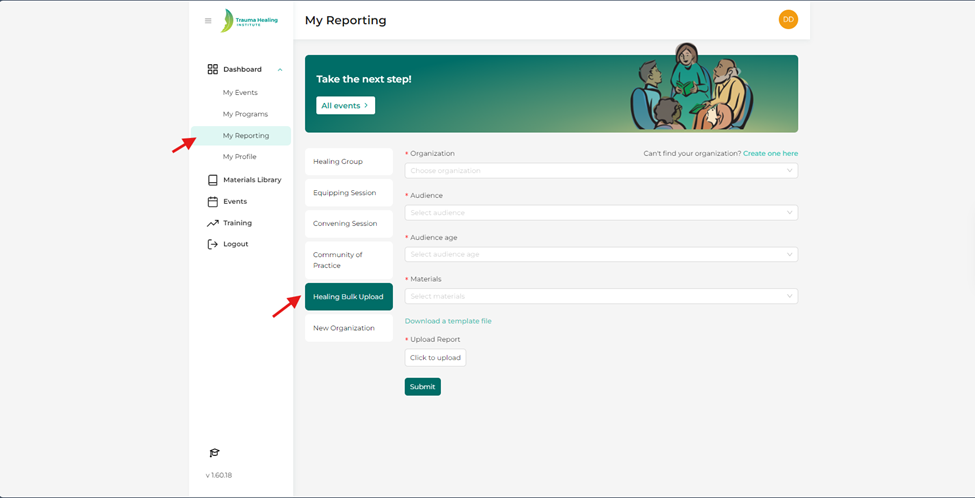
Step 1: The purpose of the healing group bulk upload tool is to allow coordinators to upload multiple healing groups. To bulk upload healing events, click on “my reporting” then “healing bulk upload”.
Please note: You can only bulk upload one type of healing group material at one time. For example, if you have multiple healing group reports for adult and teens, you will need to upload the adult healing group reports separate from the teen healing group reports.
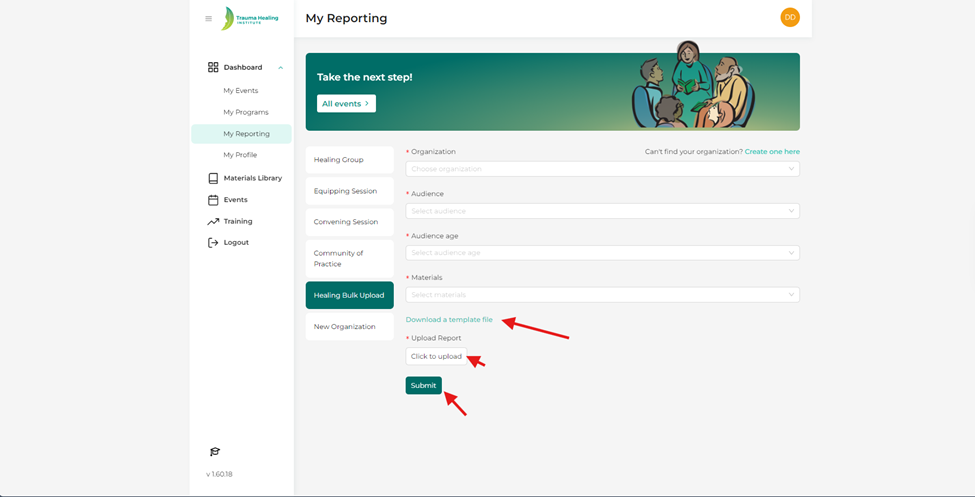
Step 2: Download the spreadsheet template file.
Step 3: Enter your HG data in the template (excel spreadsheet). Each row is one healing group. The required fields are (1) Country (spell out name, no abbreviations), (4) MF Email, (5) MF Full Name, and (8) Main Language.
Step 4: Save the template with your groups.
Be sure to utilize or review the template file for your report to ensure your information is put in correctly before uploading.
Step 5: Choose the appropriate information from each drop-down menu for “organization”, “audience”, “audience age” and “materials”.
Step 6: Upload the report by using the “click to upload” and then choosing your spreadsheet file.
Step 7: Hit submit. You will then receive an email that tells you if the submission was successful and a link to the report in TeamDesk. The report will populate directly into TeamDesk and can be found on the THI website under “Reported Events”.